Cisco’s One Button to Push with Office 365 – Setup

It seems as though the more straightforward the technology is to use, the better. It is especially true with organizations trying to simplify the user’s experience when joining a meeting from conference devices. 

One Button to Push alleviates the need to type in meeting information when joining a meeting. It simplifies the user experience by providing the users with a simple one-button-to-push to participate from their conference device. 

It is surprisingly easy to provide the One Button to Push. 

We will be going through the details of how to deploy One Button to Push for cloud registered devices and leveraging O365 to reserve those devices for a meeting. The good news is, is that there are other deployment models based on calendar deployments types if you are not an Office 365 organization today. Think G-Mail, Exchange..

The other great thing is if you have on-premise registered devices, you can leverage Cisco Webex Edge for Devices. Webex Edge for Devices will give you cloud capabilities on the conference devices while keeping the device registered on-prem. 

Prerequisites:
Admin access to Cisco Webex Control Hub – https://admin.webex.com
Admin Access to O365 tenant – I’m using a free trial of O365 Business premium
Telepresence device

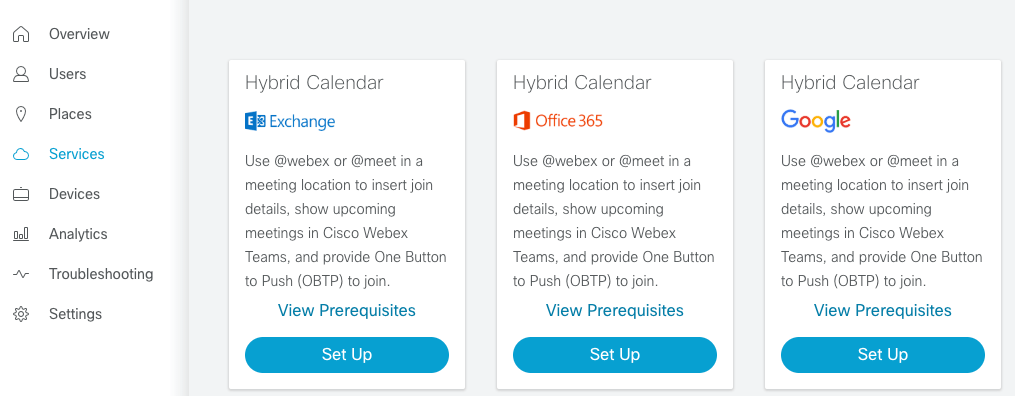
  • 1. Enable Hybrid Calendar

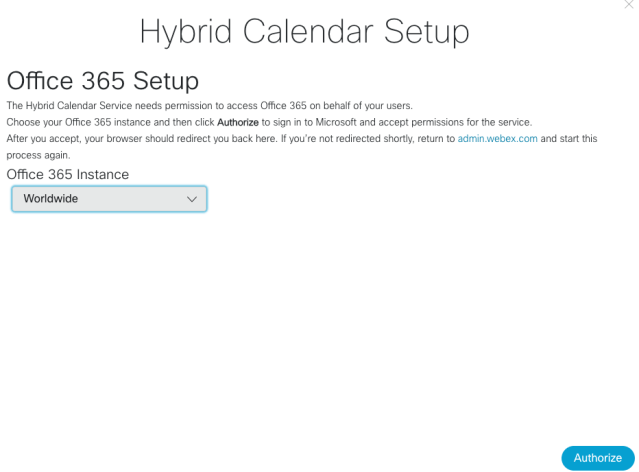
Log into https://admin.webex.com with your admin credentials. From there choose Services > Hybrid Calendar > Office 365.

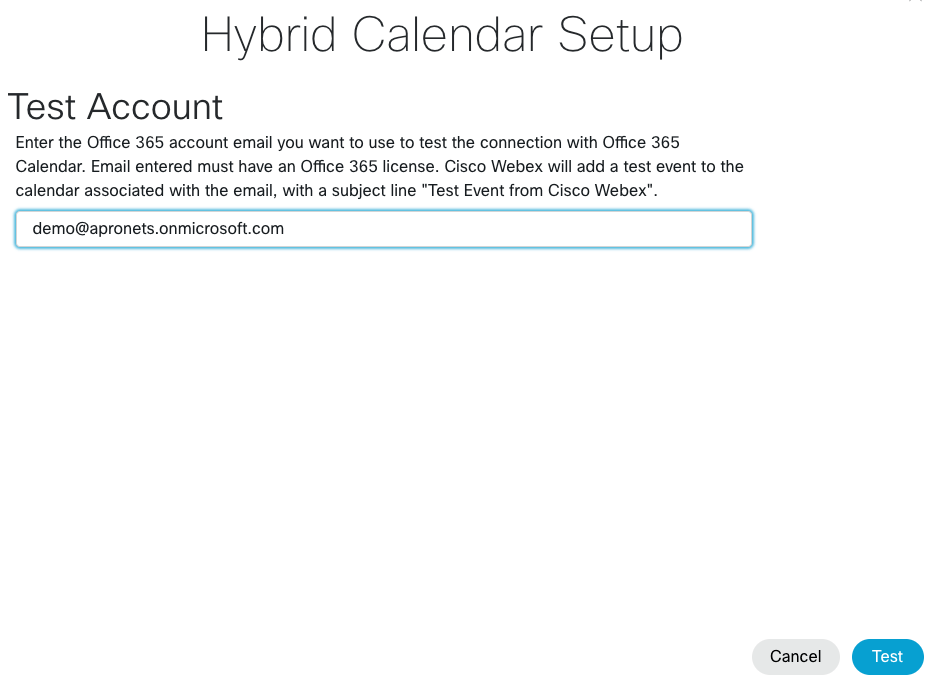
After choosing to authorize, you will be asked for an account to use to associate the Hybrid Calendar service to your Webex Control Hub. This account should be an admin account in your O365 tenant.

  • 2. Create a resource room in O365

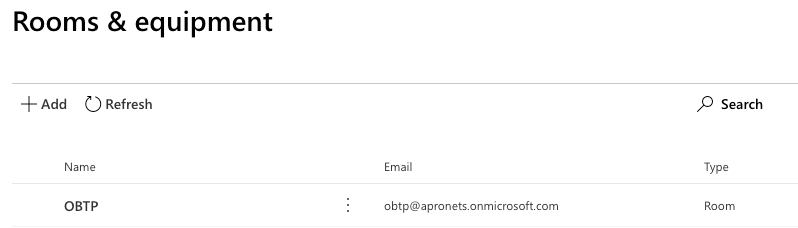
If you don’t already have a resource room created, create one now. The resource room will create a room mailbox that is used when scheduling a meeting.  

I’ve created a resource room through the admin portal https://portal.office.com/adminportal > Resources > Rooms & equipment

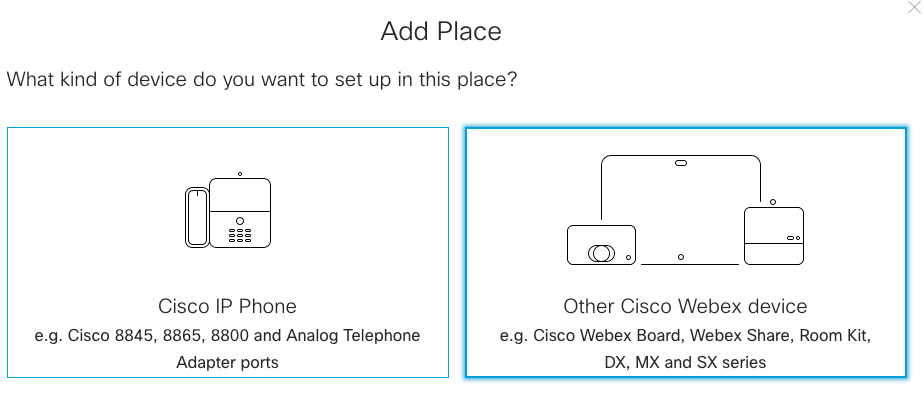
  • 3. Create a Place in Control Hub and Enroll a Telepresence Device

The “Place” will serve as a hierarchy for you to organize your device with. For this purpose, the Place will only be hosting one device. 

Choose Places Add Place > Provide a common name for the device. Click Next. Follow the on-screen prompts.

Activation code will be used to enroll your Telepresence device.

  • 4. Powershell

By default, Hybrid Calendar will remove the body of an email. If left as the default, any information like SIP URIs will be removed from the meeting invite and prevent OBTP from working.

This is a default behavior of O365, to strip the body of an email sent to a “room resource” (as opposed to a user mailbox). Which is why you need to connect with powershell to change the default behavior of the identity.

Before Powershell

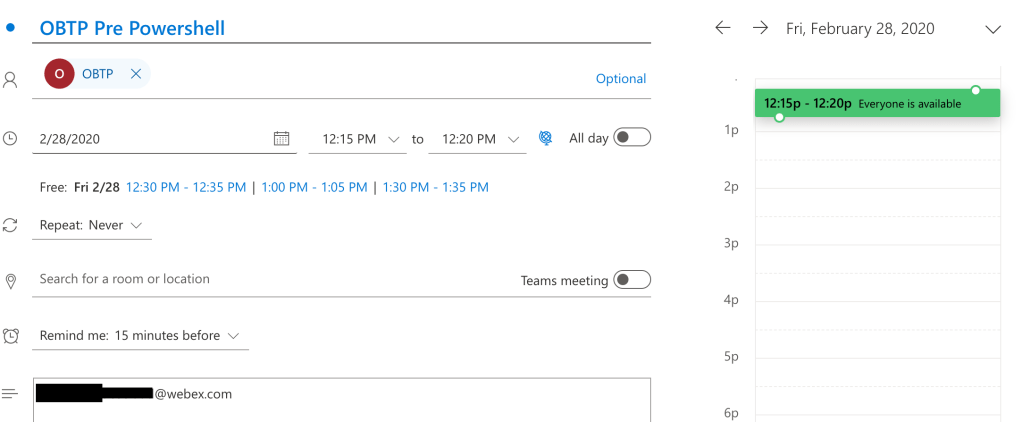
Notice that the subject of the meeting invite “OBTP Pre Powershell” isn’t in the subject of the reserved room below. Also, notice that there is no OBTP because the SIP URI was removed from the message body of the invite.

After Powershell

Notice that the subject of the meeting invite “OBTP Post Powershell” is in the subject of the reserved room below. Also, notice that there is an OBTP.

Run the below Powershell commands in order. You should provide your admin O365 account when asked for a username and password.

::To permit signed scripts to run
Set-ExecutionPolicy RemoteSigned
::Check to be sure 'Basic = True'
winrm get winrm/config/client/auth
::If Basic != True then run
winrm set winrm/config/client/auth '@{Basic="true"}'
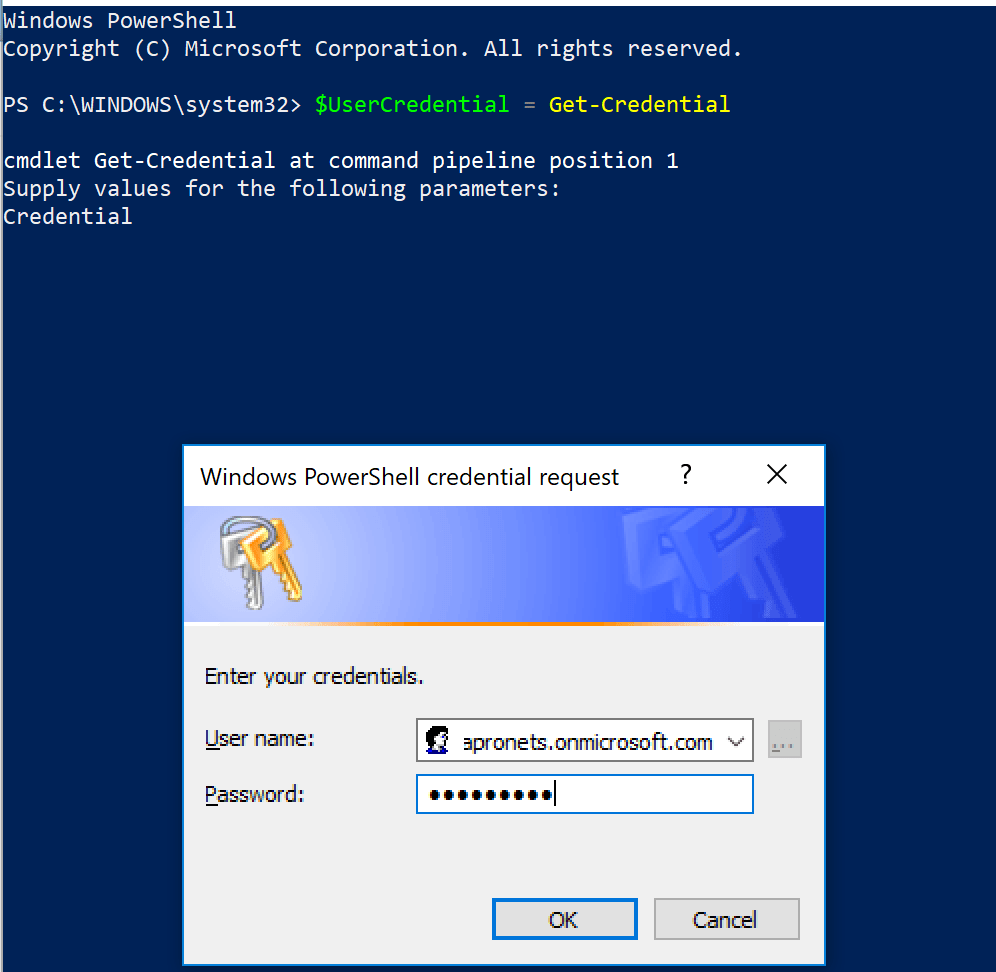
::Send O365 credentials
$UserCredential = Get-Credential
::In Pop-up Username: O365-Admin-Username password:O365-Admin-Password
::Run the below
$Session = New-PSSession -ConfigurationName Microsoft.Exchange -ConnectionUri https://outlook.office365.com/powershell-liveid/ -Credential $UserCredential -Authentication Basic -AllowRedirection
::Run the below
Import-PSSession $Session -DisableNameChecking
::Run the below
Set-CalendarProcessing -identity "obtp" -DeleteComments $false -DeleteSubject $false -AddOrganizerToSubject $false
::Disconnect when Done
Remove-PSSession $Session

Awesome! We have made life that much easier! Your Cisco conference devices can now join any SIP based meeting with One Button to Push.

Mike

References

https://docs.microsoft.com/en-us/powershell/exchange/exchange-online/connect-to-exchange-online-powershell/connect-to-exchange-online-powershell?view=exchange-ps

https://help.webex.com/en-us/uuhc6x/License-Requirements-for-Cisco-Webex-Hybrid-Services

https://help.webex.com/en-us/yvz1kw/Make-it-Easier-for-Video-Devices-to-Join-Meetings-with-OBTP#One-Button-to-Push-with-Office-365

https://www.cisco.com/c/en/us/td/docs/voice_ip_comm/cloudCollaboration/spark/hybridservices/calendarservice/cmgt_b_deploy-spark-hybrid-calendar-service.html

Cisco SDWAN and Umbrella Integration

Cisco SDWAN offers full-stack security capabilities like IPS/IDS, a stateful firewall, AMP integration, and the ability to leverage the full capabilities of Cisco Umbrella. I can’t emphasize how easy it is to bring Umbrella Security to your Cisco SDWAN deployment. Check out my short video to see how to make it happen.

Cisco SDWAN + Umbrella

Update: 9/1/2020 – This procedure has changed with the release Cisco IOS XE SD-WAN Release 16.10.x and Cisco SD-WAN Release 18.4.x – Umbrella auto-registration

Source:
https://docs.umbrella.com/hardware-integrations/docs/sd-wan-dns-layer-security-configuration

Mike

Catalyst 9300 Upgrading IOS-XE 16.6.2 onward (Install Mode)

For the 9200 upgrade procedure! Catalyst 9200, Upgrading IOS-XE 16.9.2 onward (Install Mode)

Want to be part of a monthly newsletter covering Cloud, Digital Transformation, and Web3? Check out Apronomics: December, 2022

If you would like to skip to the code used to upgrade the switch, scroll to Appendix A.

This upgrade procedure is nearly identical to the Catalyst 9200 upgrade procedure.

Note: When upgrading..

First, check to see what mode your switch is running in. The preferred mode is INSTALL mode. In my case, it is running in INSTALL mode.

Prepare the switch to accept the new IOS-XE image by freeing up some storage.

Step 1. Remove Unwanted Packages
Cat9300#install remove inactive

Step 2. Copy New Image to Flash
Cat9300#copy usbflash0:/cat9k_iosxe.x.x.x.SPA.bin flash:/

Step 3. Set Boot Variable
Cat9300(config)#boot system flash:packages.conf
Cat9300(config)#end
Cat9300#wr
Cat9300#show boot system

Step 4. Software Install Image to Flash
Cat9300#install add file flash:cat9k_iosxe.x.x.x.SPA.bin activate commit

Your screen will produce a similar output and requires a reload. Confirm a reload by hitting ‘y’.

It will take a couple of minutes to reload. After the reload, you can confirm your running mode, version and pkg files are in your flash directory.

Step 5. Verify New Packages and Image after reload
Cat9300#dir flash:*.pkg

Step 6. Check Version and New Bootloader
Cat9300#show version

Step 7. Clean up
Cat9200#install remove inactive

Hope that this helps.

Mike

Appendix A
Step 1. Remove Unwanted Packages
Cat9300#install remove inactive
Step 2. Copy New Image to Flash
Cat9300#copy usbflash0:/cat9k_iosxe.x.x.x.SPA.bin flash:/
Step 3. Set Boot Variable
Cat9300(config)#boot system flash:packages.conf
Cat9300(config)#end
Cat9300#wr
Cat9300#show boot system
Step 4. Software Install Image to Flash
Cat9300#install add file flash: cat9k_iosxe.x.x.x.SPA.bin activate commit
Step 5. Verify New Packages and Image after reload
Cat9300#dir flash:*.pkg
Step 6. Check Version and New Bootloader
Cat9300#show version
Cat9300#show boot

https://www.cisco.com/c/en/us/td/docs/switches/lan/catalyst9300/software/release/16-12/release_notes/ol-16-12-9300.html#id_67613

The open and programmable engineer

We are building our networks and services at an unbelievable rate. Not only are we innovating faster, but we are also creating a precedence of an “always-on” world.

Many things are contributing to this: the cloud, cell phones, WiFi, to name a few. How are we, as engineers, expected to keep pace with the needs of businesses, consumers and an “always-on” world?

It starts with us embracing a new set of skills: programmatic skills, which in my opinion, will be a foundational skill moving forward for anyone in IT. Understanding python, data models, and data formats are skills that the next-gen engineer will be required to have. It will grant us the ability to maintain the status quo of “always-on.” As a by-product, it will bring predictability, assurance, and agility to how we operate our networks.

Unfortunately for myself, I am late to the table. I spent 14-months and a grueling study schedule to achieve my CCIE. During this time, I missed out on learning how to be programmatic, open, and agile in a programmable age.

But it isn’t too late.

The hardest part about adopting these new skills won’t be learning them but forgetting about our old habits. I’m not talking about forgetting how STP operates or how to manage routing protocols. I’m talking about not keeping a notepad of staged configurations or working from a command-line interface.

The most natural part will be our ability to solve issues just as well, if not better, and to solve them at scale. Join me on the journey to adopt the skill required to meet the demands of an “always-on” world.

Mike

Catalyst 9200, Upgrading IOS-XE 16.9.2 onward (Install Mode)

UPDATE! For 9200 when you get to 17.3.x Catalyst 9200, Upgrading IOS-XE Amsterdam 17.3.x (Install Mode)

For the 9300 upgrade procedure! Catalyst 9300 Upgrading IOS-XE 16.6.2 onward (Install Mode)

Want to be part of a monthly newsletter covering Cloud, Digital Transformation, and Web3? Check out Apronomics: December, 2022

If you would like to skip to the code used to upgrade the switch, scroll to Appendix A.

First, check to see what mode your switch is running in. The preferred mode is INSTALL mode. In my case, it is running in BUNDLE mode.

We will switch the running mode of the switch during the upgrade process.

Prepare the switch to accept the new IOS-XE image by freeing up some storage.

Step 1. Remove Unwanted Packages
C9200#install remove inactive

Step 2. Copy New Image to Flash
C9200#copy usbflash1:cat9k_lite_iosxexxx.bin flash:

Step 3. Set Boot Variable
C9200(config)#boot system flash:packages.conf
C9200(config)#end
C9200#wr
C9200#show boot system

Step 4. Software Install Image to Flash
C9200K#install add file flash: cat9k_lite_iosxexxx.bin activate commit

After hitting ‘y’, you will be asked to confirm that you have changed the boot config to packages.conf. You should have done this in Step 3.

Confirm by hitting ‘y’. Your screen will produce a similar output and requires a reload.

It will take a couple of minutes to reload. After the reload, you can confirm your running mode, version and pkg files are in your flash directory.

Step 5. Verify New Packages and Image after reload
C9200#dir flash:*.pkg

Step 6. Check Version and New Bootloader
C9200#show version
C9200#show boot

Note: Previously the 9200 was running in BUNDLE mode. After the reload, it is running in INSTALL mode.

Step 7. Clean up
C9200#install remove inactive

Hope that this helps.

Mike

Appendix A
Step 1. Remove Unwanted Packages
C9200K#install remove inactive
Step 2. Copy New Image to Flash
C9200K#copy usbflash1:cat9k_lite_iosxexxx.bin flash:
Step 3. Set Boot Variable
C9200K(config)#boot system flash:packages.conf
C9200K (config)#end
C9200K#wr
C9200K#show boot system
Step 4. Software Install Image to Flash
C9200K#install add file flash: cat9k_lite_iosxexxx.bin activate commit
Step 5. Verify New Packages and Image after reload
C9200K#dir flash:*.pkg
Step 6. Check Version and New Bootloader
C9200K#show version
C9200K#show boot

https://www.cisco.com/c/en/us/td/docs/switches/lan/catalyst9200/software/release/16-9/configuration_guide/sys_mgmt/b_169_sys_mgmt_9200_cg/performing_setup_configuration.html#id_57156

https://www.cisco.com/c/en/us/td/docs/switches/lan/catalyst9200/software/release/16-12/release_notes/ol-16-12-9200.html#id_67619