UPDATE! For 9200 when you get to 17.3.x Catalyst 9200, Upgrading IOS-XE Amsterdam 17.3.x (Install Mode)
For the 9300 upgrade procedure! Catalyst 9300 Upgrading IOS-XE 16.6.2 onward (Install Mode)
Want to be part of a monthly newsletter covering Cloud, Digital Transformation, and Web3? Check out Apronomics: December, 2022
If you would like to skip to the code used to upgrade the switch, scroll to Appendix A.
First, check to see what mode your switch is running in. The preferred mode is INSTALL mode. In my case, it is running in BUNDLE mode.
We will switch the running mode of the switch during the upgrade process.

Prepare the switch to accept the new IOS-XE image by freeing up some storage.
Step 1. Remove Unwanted Packages C9200#install remove inactive
Step 2. Copy New Image to Flash
C9200#copy usbflash1:cat9k_lite_iosxexxx.bin flash:


Step 3. Set Boot VariableC9200(config)#boot system flash:packages.conf
C9200(config)#end
C9200#wr
C9200#show boot system

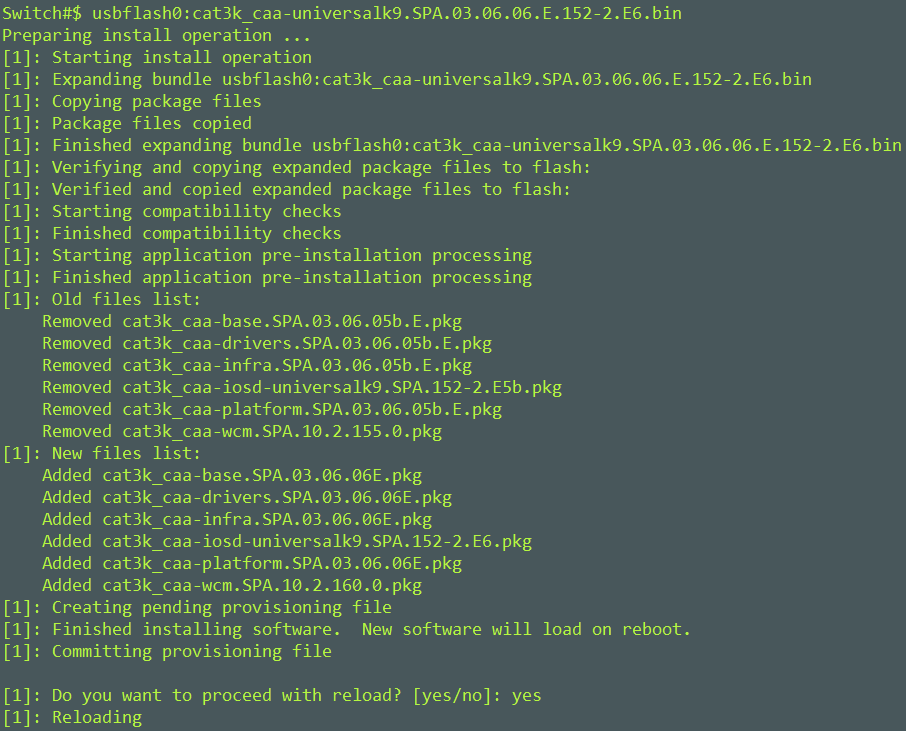
Step 4. Software Install Image to Flash
C9200K#install add file flash: cat9k_lite_iosxexxx.bin activate commit

After hitting ‘y’, you will be asked to confirm that you have changed the boot config to packages.conf. You should have done this in Step 3.

Confirm by hitting ‘y’. Your screen will produce a similar output and requires a reload.

It will take a couple of minutes to reload. After the reload, you can confirm your running mode, version and pkg files are in your flash directory.
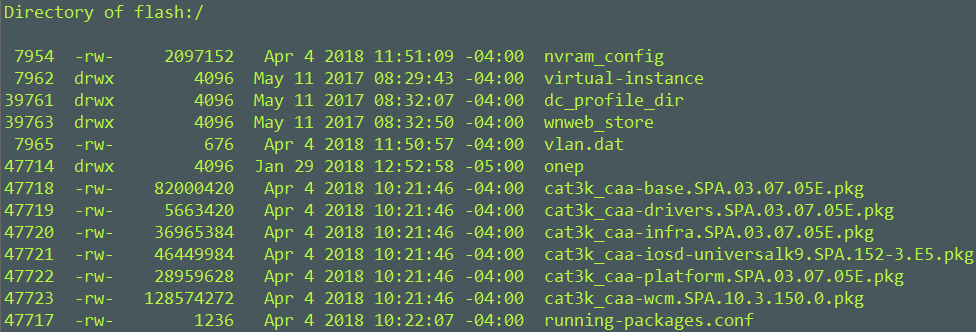
Step 5. Verify New Packages and Image after reload
C9200#dir flash:*.pkg

Step 6. Check Version and New Bootloader C9200#show version
C9200#show boot

Note: Previously the 9200 was running in BUNDLE mode. After the reload, it is running in INSTALL mode.

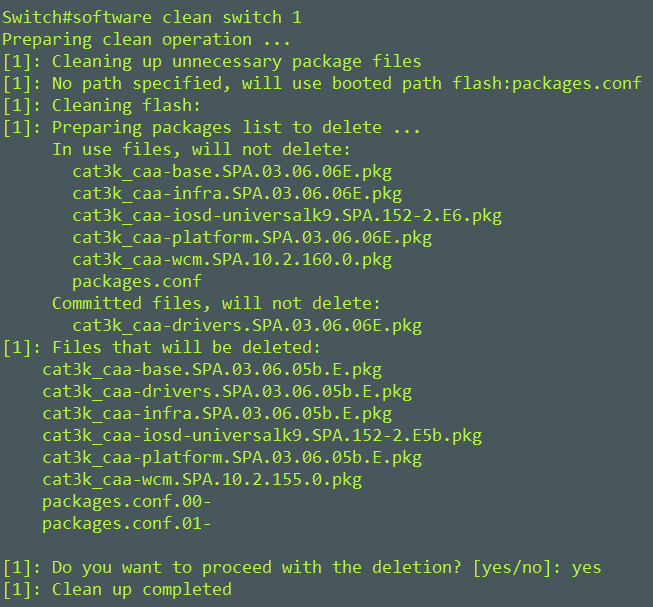
Step 7. Clean upC9200#install remove inactive


Hope that this helps.
Mike
Appendix A
Step 1. Remove Unwanted Packages
C9200K#install remove inactive
Step 2. Copy New Image to Flash
C9200K#copy usbflash1:cat9k_lite_iosxexxx.bin flash:
Step 3. Set Boot Variable
C9200K(config)#boot system flash:packages.conf
C9200K (config)#end
C9200K#wr
C9200K#show boot system
Step 4. Software Install Image to Flash
C9200K#install add file flash: cat9k_lite_iosxexxx.bin activate commit
Step 5. Verify New Packages and Image after reload
C9200K#dir flash:*.pkg
Step 6. Check Version and New Bootloader
C9200K#show version
C9200K#show boot